
VideoModel with commands, a generation loop, frame emission, and cleanup. Now
it is time to run it.
If you are here after completing the guide, this is where you see your model come to life. If you
are here because you have a model you want to run locally (cloned or written), this page covers
everything you need.
Runtimes
YourVideoModel does not know where frames go or where commands come from. Runtimes are the
connectors that hook it up to inputs and outputs. When your code calls get_ctx().emit_block(frames),
the runtime decides what happens: stream to a browser, write to disk, etc. Your model code stays
the same.
Reactor ships two runtimes:
| Runtime | Description |
|---|---|
| HTTP | Runs your model in an HTTP server with WebRTC streaming. Best for local development and demos. |
| Headless | Runs in a CLI. Commands are JSON on stdin, frames are written to a file. Does not support video input. Useful for batch processing and testing. |
The HTTP Runtime
For local development and demos, the HTTP runtime is the way to go. It starts a FastAPI server that:- Exposes REST endpoints for session control
- Handles WebRTC connections for real-time video streaming
- Routes commands from the frontend to your model
Starting the Runtime
If you have not already, install the runtime:@model decorated class) and run:
http://localhost:8080 by default. You will see logs as the model loads:
--help to see available options:
| Flag | Description | Default |
|---|---|---|
--host | Host to bind the server to | 0.0.0.0 |
--port | Port to bind the server to | 8080 |
--orphan-timeout | Seconds to wait before stopping a session with no connected client | 30.0 |
--webrtc-port-range | UDP port range for WebRTC ICE in format min:max | Ephemeral |
--stun-server | STUN server URL (can be specified multiple times) | Google STUN |
--turn-server | TURN server in format username;credential;url (can be specified multiple times) | None |
Configuring WebRTC Port Range
By default, WebRTC uses ephemeral ports for ICE (Interactive Connectivity Establishment) UDP traffic. In environments with strict firewall rules, you may need to restrict WebRTC to a specific port range.Via CLI Flag
Specify a port range using the--webrtc-port-range flag:
Via Environment Variable
Set theWEBRTC_PORT_RANGE environment variable with the same format:
Ensure your firewall allows UDP traffic on the configured port range. The range must use ports
above 1023 (non-privileged ports).
Configuring STUN/TURN Servers
WebRTC requires STUN/TURN servers to establish peer-to-peer connections, especially when clients are behind NAT or firewalls. By default, the runtime uses Google’s public STUN server (stun:stun.l.google.com:19302), which works for most local development scenarios.
For production or restrictive network environments, you may need to configure your own STUN/TURN servers.
Via CLI Flags
You can specify STUN and TURN servers using CLI flags. Both flags can be repeated to add multiple servers:Via Environment Variables
Alternatively, configure ICE servers using environment variables:| Variable | Format | Example |
|---|---|---|
STUN_SERVERS | Comma-separated URLs | stun:stun1.example.com,stun:stun2.example.com |
TURN_SERVERS | Comma-separated username;credential;url entries | user;pass;turn:turn.example.com:3478 |
CLI flags take precedence over environment variables. If you specify
--stun-server or --turn-server
on the command line, the corresponding environment variable is ignored.Connecting a Frontend
The fastest way to get a frontend running is with our interactive CLI. It scaffolds a complete React app with the Reactor SDK already configured:- npm
- pnpm
Manual Setup
If you prefer to add Reactor to an existing project, install the SDK:- npm
- pnpm
Basic Structure
Here’s a minimal React setup to connect to your local model:page.tsx
ReactorProvider manages the connection, and ReactorView displays the video stream.
Set modelName to the name from your model’s @model(name="...") decorator.
When running locally, any model name will work since only one model runs on the HTTP server.
However, use the actual model name for consistency and to avoid issues when deploying to production.
Adding Controls
Use theuseReactor hook to access connection state and actions:
Controls.tsx
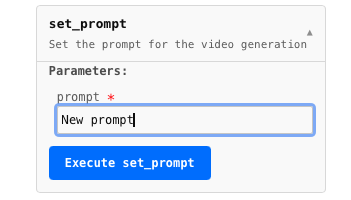
Using the Dynamic Controller
For quick prototyping, the SDK includes aReactorController that auto-generates UI for your model’s commands:
page.tsx
@command decorated methods and renders appropriate inputs.
Full Example
Here’s a complete page with status display and controls:page.tsx
Provider Props
| Prop | Type | Default | Description |
|---|---|---|---|
modelName | string | required | Name from the @model decorator |
local | boolean | false | Connect to localhost:8080 instead of production |
autoConnect | boolean | true | Automatically connect on mount |
coordinatorUrl | string | — | Override the coordinator URL (useful for custom ports) |
jwtToken | string | — | Authentication token for production |
Quick Start Checklist
Congratulations! You have completed the Reactor Runtime guide. Your model can now:
- Load weights once and serve many users
- Accept real-time commands from clients
- Generate frames in a continuous loop with real-time conditioning
- Emit frames smoothly regardless of generation speed
- Clean up properly between sessions
- Run locally with the same behavior as production